How to Scan a Passport for a UK ETA | Easy Step-by-Step Guide
To get your UK ETA application right, you have to nail the passport scan. It's the first thing officials look at, and a clear, complete, high-quality copy is non-negotiable. A blurry or cropped scan is the fastest way to get your application delayed or even rejected. Getting this part perfect is your first step to a smooth, stress-free process for your travel authorization for the UK.
Why a Perfect Passport Scan Matters for Your UK ETA
Before you even think about scanning, you need to understand why this one image carries so much weight. Your passport scan is the primary digital proof of your identity for the UK Electronic Travel Authorisation (ETA) application. Both automated systems and human reviewers will scrutinize this file to verify your information.
A flawless scan makes sure every critical detail is perfectly legible. I’m talking about:
- Your full name and date of birth
- Your passport number and expiration date
- Your photograph
- The Machine Readable Zone (MRZ)—those two lines of text and chevrons at the bottom
Any glare, shadow, or blur can make this information unreadable, instantly flagging your application for a manual review or, worse, an outright rejection. This isn't just about following the rules; it's about avoiding frustrating and completely avoidable setbacks.
Nailing the scan from the start means you can focus on the exciting part—planning your trip to the United Kingdom. For a full rundown of what’s needed, you can learn more about the UK ETA application process in our detailed guide.
Key Takeaway: A high-quality passport scan isn't optional. It's the cornerstone of your UK ETA application, and mistakes here are the single most common cause of unnecessary delays.
Choosing Your Scanning Tool: Smartphone vs. Scanner
When it comes to scanning your passport for the UK ETA application, you've got two main options: your smartphone or a flatbed scanner. Your choice here really matters, as a poor-quality scan is one of the quickest ways to get your application delayed or even rejected.

Let's be real—your phone is probably the easiest and quickest tool you have. It's right there in your pocket. The downside? It's incredibly easy to mess up. A slight shadow from your hand, a bit of glare from the ceiling light, or holding your phone at a weird angle can create a distorted image that automated systems can't read.
A flatbed scanner, on the other hand, is the gold standard for quality. Laying your passport flat on the glass gets rid of shadows, reflections, and perspective issues. The result is a perfectly crisp, clear image every single time. It might be less convenient, but it's a much safer bet for something as important as an official application.
Smartphone vs Flatbed Scanner: A Quick Comparison
To help you decide, here’s a straightforward look at how the two methods stack up for your ETA application.
| Feature | Smartphone App | Flatbed Scanner |
|---|---|---|
| Convenience | Excellent—scan anywhere, anytime. | Fair—requires access to the device. |
| Image Quality | Good to Poor—highly dependent on lighting and user skill. | Excellent—consistently clear and high-resolution. |
| Risk of Rejection | Higher due to potential for glare, shadows, and distortion. | Very low when used correctly. |
| Speed | Fast for a single scan. | Slower setup but reliable. |
Ultimately, the best tool depends on what you have available and how confident you are in getting a crystal-clear shot.
This whole process is a long way from the old days of manual inspections. Ever since machine-readable passports came on the scene in the 1980s, that scannable section at the bottom of your passport—the Machine Readable Zone (MRZ)—has become critical. It's what allows machines to read your details instantly and accurately. This is why the legibility of your scan is non-negotiable. If you're interested in how this tech has changed travel, Henley & Partners has some great insights on how these technologies have shaped global mobility.
How to Scan a Passport Perfectly with Your Smartphone
Grabbing your smartphone is easily the quickest way to scan your passport, but just snapping a quick picture won't cut it. In fact, a low-quality image is one of the top reasons we see UK ETA applications get held up, so taking a moment to do it right is time well spent.
First things first: lighting is everything. You'll want to find a spot with plenty of bright, indirect natural light. Think near a window, but out of the path of any direct sunbeams that could create a nasty glare on your passport's laminated page. It’s also a good idea to turn off any overhead lights and, whatever you do, disable your phone's flash. Both are guaranteed to cause reflections that will block your personal details.
Next, find a good surface. Place your passport on something dark and non-reflective, like a plain wooden table or even a sheet of black construction paper. This simple trick creates a sharp contrast, helping the edges of your passport page stand out clearly in the final image.
Getting the Perfect Shot
Now for the scan itself. Position your phone so it’s directly over the passport and completely parallel to the surface you're using. If you hold it at an angle, even a slight one, the image will be distorted and look more like a trapezoid than a rectangle—a surefire way to get it rejected.
Hold your phone steady with both hands and tap the screen to focus squarely on the text. You want every detail, especially your photo and the Machine Readable Zone (MRZ) at the bottom, to be tack-sharp.
Before you move on, do a quick quality check:
- Are all four corners of the passport’s information page visible?
- Are your fingers completely out of the frame? Even a tiny overlap can cause an issue.
- Is it blurry? Zoom in on the image you just took and make sure you can read every single letter and number without squinting.
For a complete walkthrough of the entire process, from scanning your passport to submitting your form, check out our general guide on the ETA application.
Saving and Uploading Your Scan
Getting a great picture is only half the battle; the technical details of the file matter just as much.
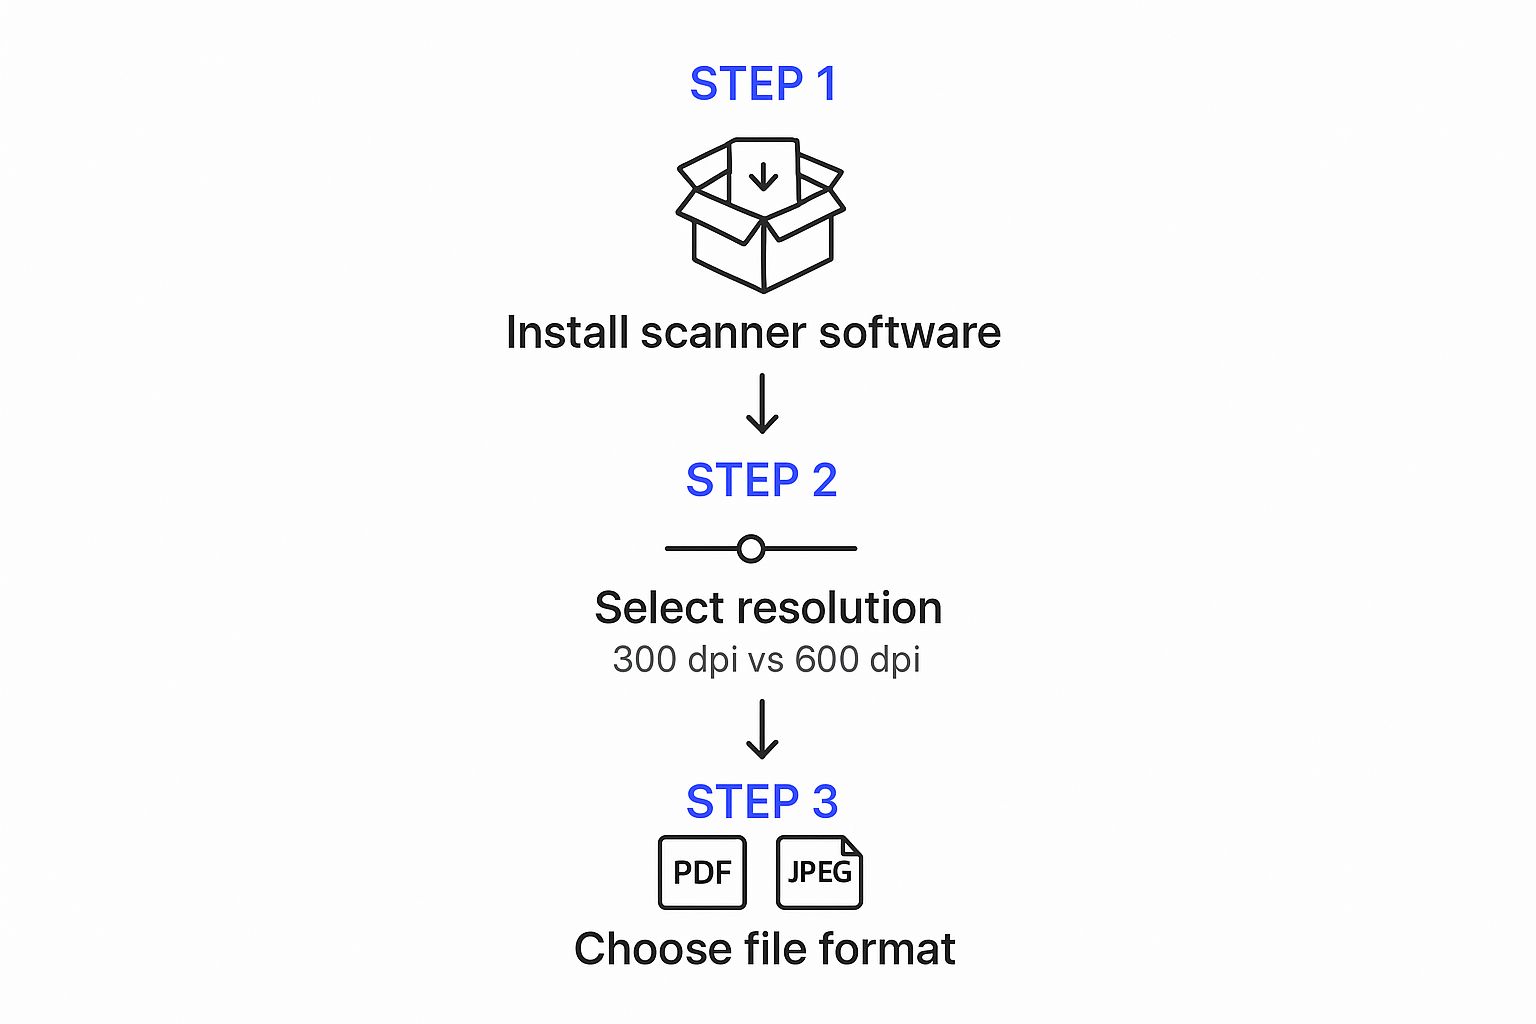
As the infographic shows, you need to pay attention to the settings. A resolution of 300 DPI is the standard for a reason—it ensures your scan is high-quality without being a massive file. When you're ready to save, choose a common format like JPEG or PNG. Finally, give the file size one last check to make sure it falls within the application's limits before you hit upload.
Getting Flawless Results from a Flatbed Scanner
If you have a flatbed scanner, you're in luck. It’s hands-down the best way to get a high-quality, rejection-proof scan for your UK ETA application. Using a scanner gives you a controlled environment, which means you can say goodbye to the annoying glare, weird shadows, and distorted angles that often ruin smartphone photos.
First things first: start with a clean slate. Grab a microfiber cloth and give the scanner glass a quick wipe-down to get rid of dust and fingerprints. Even a tiny speck can show up on the final image and potentially block important information.
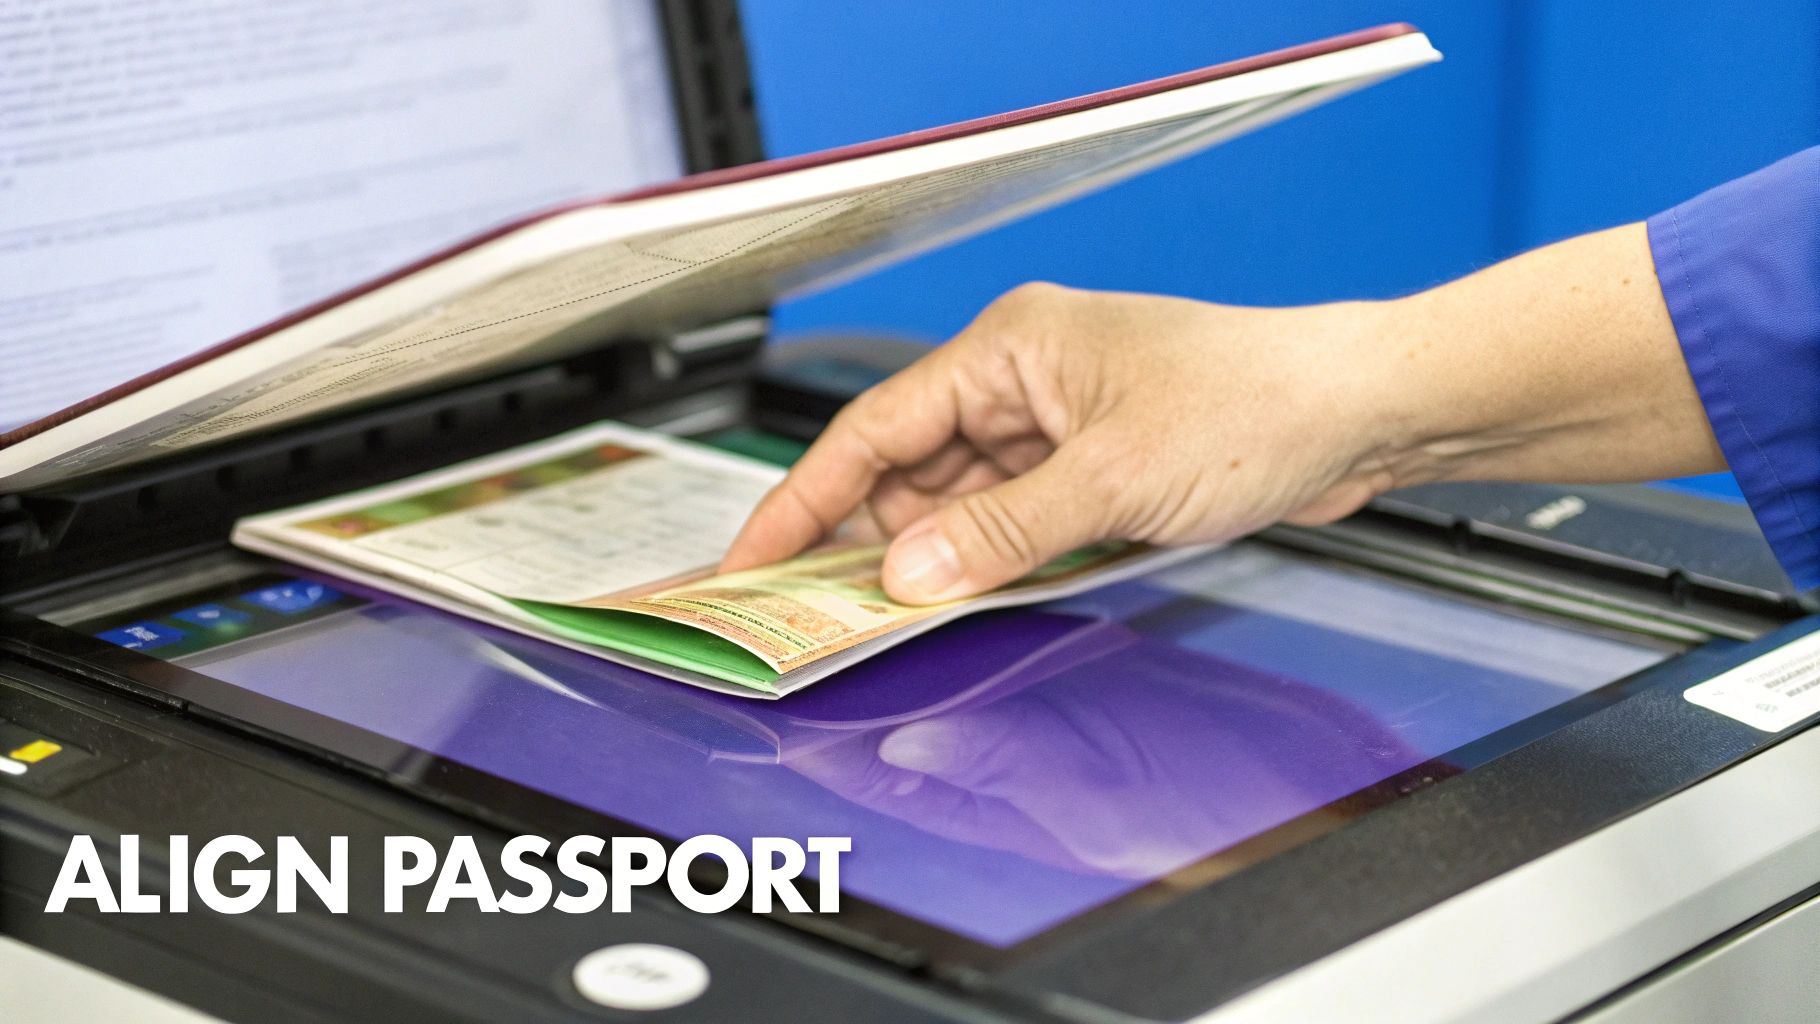
Now, open your passport to the bio-data page (the one with your photo and details) and place it face-down on the glass. Make sure you line it up neatly with the corner guides. This little step ensures your scan is perfectly straight and captures all four corners of the page.
Dialing in the Perfect Settings
The real power of a flatbed scanner comes from its settings. Getting these right is the key to creating a file that will sail through the application process.
Here’s what you need to focus on:
- Resolution: Set it to 300 DPI (Dots Per Inch). This is the gold standard for document scanning—it delivers a crystal-clear image without making the file size enormous.
- Color Mode: Always scan in full color. Even though the page is mostly black and white, this setting accurately captures your photo and any subtle security features embedded in the passport.
- File Format: Save your scan as a JPEG (.jpg) or PNG (.png). These are the most common formats and are accepted by virtually all online application systems.
Getting this level of precision is about more than just a clear picture; it mimics the tech used at border control. Airport passport scanners use advanced methods like Optical Character Recognition (OCR) to verify identities quickly. While you don't need OCR, a high-quality scan ensures your details are just as readable.
Once your scan is saved, it's ready to upload. Remember, a perfect scan is just one piece of the puzzle. It's crucial to have all your paperwork in order. For a full rundown, check out our guide on the other UK visa documents you might need.
Common Scanning Mistakes and How to Avoid Them
Before you hit "upload," take a moment for one last quality check. It might seem like a small step, but even a tiny mistake on your passport scan can cause a major delay in your UK ETA application. Catching these common slip-ups now is the best way to avoid a preventable rejection.
One of the most frequent problems we see is an incomplete image. Always make sure all four corners of your passport's main information page are clearly visible. The automated systems are trained to see the entire page, and if any part is cut off, it will likely fail verification and send your application into a lengthy manual review queue.
Final Checks for a Perfect Scan
Think of this as your pre-flight checklist. Running through these points can save you a world of trouble down the line.
- Watch Out for Fingers and Thumbs: Be careful not to hold the page down with your fingers in the shot. Even a small obstruction can cover up critical data and cause the scan to be rejected.
- Check for Glare and Reflections: Is there a bright spot from a lamp or window obscuring your photo or personal details? If you see any glare, you’ll need to rescan in better, more even lighting.
- Make Sure the MRZ is Sharp: Look closely at those two lines of text at the very bottom of the page—that’s the Machine Readable Zone (MRZ). Every single character needs to be crystal clear and perfectly readable.
A blurry photo or an unreadable MRZ are immediate red flags for processing systems. These small details are often what separates a fast, successful application from a rejected one.
Getting the scan right is a crucial part of the process. For more guidance on filling out the rest of your paperwork, our article on the UK tourist visa form offers additional helpful tips.
Let AssistEntry Handle Your Application with Confidence
If fiddling with scanner settings and worrying about file requirements sounds like a headache, you're not alone. This is exactly why so many travelers turn to a trusted third-party application assistance provider like us to handle their UK ETA application.

Our service takes the guesswork out of the entire process. We provide full verification of your application before submission, including a careful review of your passport scan to make sure it meets every single government standard. Our experts perform error-checking and a compliance review to spot common mistakes before they turn into problems, increasing your chances of approval.
To simplify your UK ETA application and increase your chances of approval, consider using AssistEntry—their experts guide you through the entire process, starting from just $79.
Why risk a rejection or delay over something as simple as a blurry image or the wrong file format?
The team at AssistEntry specializes in managing these exact details, giving you total peace of mind. We ensure every part of your application—especially that critical passport scan—is perfect. That way, you can get back to what really matters: planning your trip to the UK.
Common Questions About Scanning Your Passport
Getting the passport scan right is one of the most critical parts of the UK ETA application. Here are a few quick answers to the questions we hear most often.
What’s the Best File Format for My Scan?
Keep it simple: JPEG or PNG. These are the formats UK immigration systems expect. They offer a good balance between a clear, high-quality image and a file size that won’t give you trouble during upload. Steer clear of formats like TIFF or HEIC, as they’re often too big or just plain incompatible.
Can I Just Take a Photo Instead of a Scan?
Yes, but you can’t treat it like a casual snapshot. When you use your phone, you need to think like a scanner. The goal is a flat, crystal-clear image with zero glare or shadows. This is why a dedicated scanner app is your best bet—it helps correct the perspective and makes sure all four corners of the passport page are perfectly captured.
What Is the Biggest Mistake to Avoid?
The single biggest error we see is an incomplete image. If you cut off any of the four corners or, even worse, the Machine Readable Zone (MRZ) at the bottom, your application is almost guaranteed to be rejected. Before you upload, take a second to confirm the entire bio-data page is visible.
Does the Passport Page Really Need to Be Perfectly Flat?
Absolutely. A passport page that’s even slightly curved or bent can distort your photo and the text, which can confuse the automated systems that first check your application. Make sure to press the page down firmly (without getting your fingers in the shot!) or let the lid of a flatbed scanner do the work for you.
Navigating all these technical details can feel like a chore. If you'd rather not worry about it, let the experts at AssistEntry handle your UK ETA application. We check every detail to make sure your submission is perfect, which significantly boosts your chances of approval.
Our service starts from just $79, a price that includes the government fee and all costs.
To get started and simplify your travel prep, begin your application with AssistEntry’s UK ETA service.